React to events
To make a web page interactive, you have to respond to user actions. Let's discover how to do so.
Introduction to events
Up until now, your JavaScript code was executed right from the start. The execution order of statements was determined in advance and the only user interactions were data input through prompt() calls.
To add more interactivity, the page should react to the user's actions: clicking on a button, filling a form, etc. In that case, the execution order of statements is not determined in advance anymore, but depends on the user behavior. His actions trigger events that can be handled by writing JavaScript code.
This way of writing programs is called event-driven programming. It is often used by user interfaces, and more generally anytime a program needs to interact with a user.
A first example
Here's some starter HTML code.
And here's the associated JavaScript code.
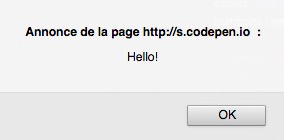
const showMessage = () => {
  alert("Hello!");
};

// Access the button
const buttonElement = document.getElementById("myButton");
// Listen to the "click" event
buttonElement.addEventListener("click", showMessage);
Clicking on the web page button shows an "Hello! message.
Adding an event listener
Called on a DOM element, the addEventListener() method adds a handler for a particular event. This method takes as parameter the event type and the associated function. This function gets called whenever an event of the corresponding type appears for the DOM element.
The above JavaScript code could be rewritten more concisely using an anonymous function, for an identical result.
// Show a message when the user clicks on the button
document.getElementById("myButton").addEventListener("click", () => {
  alert("Hello!");
});
Removing an event listener
In some particular cases, you might want to stop reacting to an event on a DOM element. To achieve this, call the removeEventListener() on the element, passing as a parameter the function which used to handle the event.
Note
This can only work if the handler function is not anonymous.
The event family
Many types of events can be triggered by DOM elements. Here are the main event categories.
| Category | Examples |
|---|---|
| Keyboard events | Pressing or releasing a key |
| Mouse events | Clicking on a mouse button, pressing or releasing a mouse button, hovering over a zone |
| Window events | Loading or closing a page, resizing, scrolling |
| Form events | Changing focus on a form field, submitting a form |
Every event is associated to an Event object which has both properties (information about the event) and methods (ways to act on the event). This object can be used by the handler function.
Many properties of the Event object associated to an event depend on the event type. Some properties are always present, like type that returns the event type and target that return the event target (the DOM element that is the event source).
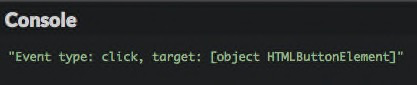
The Event object is passed as a parameter to the handler function. The following code uses this object to show the event type and target in the console.
// Show event type and target when the user clicks on the button
document.getElementById("myButton").addEventListener("click", e => {
  console.log(`Event type: ${e.type}, target: ${e.target}`);
});
Note
The parameter name chosen for the Event object is generally e or event.
Reacting to common events
Key presses
The most common solution for reacting to key presses on a keyboard involves handling keydown and keyup events that happen on a web page (the DOM body element, which corresponds to the global variable called document in JavaScript).
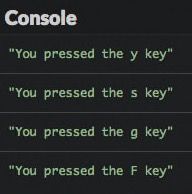
The following example shows in the console the character associated to a pressed key. The string value of the key is given by the key property of the Event object associated to the event.
// Show the pressed key
document.addEventListener("keyup", e => {
  console.log(`You pressed the ${e.key} key`);
});
To manage the press and release of any key, you'll use both keydown and keyup events. In the following example, we output the event type and the key's code, using the type and keyCode properties of the Event object.
// Show information on a keyboard event
const keyboardInfo = e => {
  console.log(`Keyboard event: ${e.type}, key: ${e.keyCode}`);
};

// Integrate this function into key press and release:
document.addEventListener("keydown", keyboardInfo);
document.addEventListener("keyup", keyboardInfo);
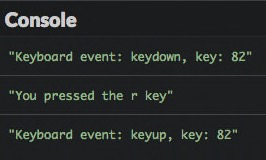
This result demonstrates that the launch order of keyboard-related events is as expected: keydown -> keyup.
Note
The keydown event is fired several times when a key is kept pressed.
Mouse clicks
Mouse clicks on any DOM element produce a event of the click type. Tactile interfaces like smartphones and tablets also have click events associated with buttons, which are kicked off by actually pressing a finger on the button.
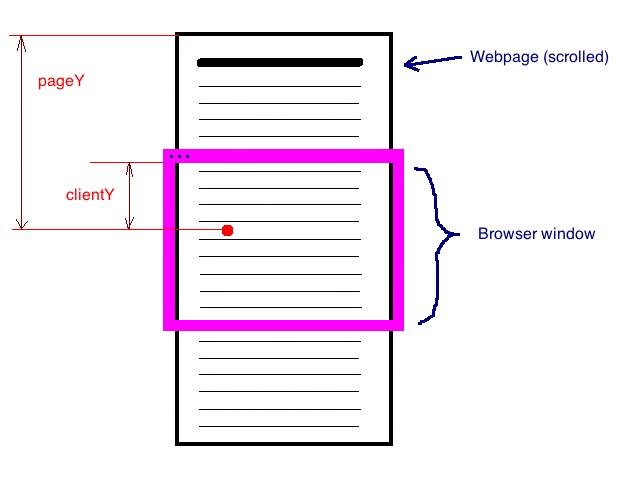
The Event object associated with a click event has a button property which lets you know the mouse button used, as well as clientX and clientY properties that return the horizontal and vertical coordinates of the place where the click happened. These coordinates are defined relative to the page zone currently shown by the browser.
The below code shows information on all click events that happen on a web page. The mouseInfo() function associated to the event uses another function, called getMouseButton(), to retrieve the clicked mouse button.
// Return the name of the mouse button
const getMouseButton = code => {
let button = "unknown";
switch (code) {
case 0: // 0 is the code for the left mouse button
button = "left";
break;
case 1: // 1 is the code for the middle mouse button
button = "middle";
break;
case 2: // 2 is the code for the right button
button = "right";
break;
}
return button;
};
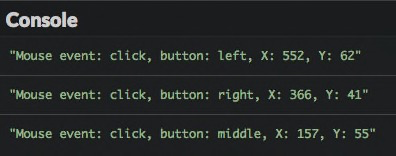
// Show info about mouse event
const mouseInfo = e => {
console.log(
`Mouse event: ${e.type}, button: ${getMouseButton(
e.button
)}, X: ${e.clientX}, Y: ${e.clientY}`
);
};
// Add mouse click event listener
document.addEventListener("click", mouseInfo);
You can use mousedown and mouseup events similarly to keydown and keyup to deal with mouse buttons' press and release events. The code below associates the same handler to these two events.
// Handle mouse button press and release
document.addEventListener("mousedown", mouseInfo);
document.addEventListener("mouseup", mouseInfo);
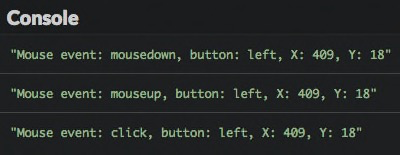
The appearance order for mouse-related events is: mousedown -> mouseup -> click.
Page loading
Depending on how complex it is, a web page can take time to be entirely loaded by the browser. You can add an event listener on the load event produced by the window object (which represents the browser window) to know when this happens. This avoids messy situations where JavaScript interacts with pages that aren’t fully loaded.
The following code displays a message in the console once the page is fully loaded.
// Web page loading event
window.addEventListener("load", e => {
  console.log("The page has been loaded!");
});
Page closing
You sometimes want to react to page closing. Closing happens when the user closes the tab displaying the page or navigates to another page in this tab. A frequent use case consists of showing a confirmation dialog to the user. Handling page closing is done by adding a handler for the beforeunload event on the window object.
// Handle page closing
window.addEventListener("beforeunload", e => {
  const message = "Should you stay or should you go?";
  // Standard way of showing a confirmation dialog
  e.returnValue = message;
  // Browser-specific way of showing a confirmation dialog
  return message;
});
Setting the value of the
returnValueproperty on theEventobject is the standard way of triggering a confirmation dialog showing this value. However, some browsers use the return value of the event listener instead. The previous code associate the two techniques to be universal.
Go farther with events
Event propagation
The DOM represents a web page as a hierarchy of nodes. Events triggered on a child node are going to get triggered on the parent node, then the parent node of the parent node, up until the root of the DOM (the document variable). This is called event propagation.
To see propagation in action, use this HTML code to create a small DOM hierarchy.
Here's the complementary JavaScript code. It adds click event handlers on the button, its parent (the paragraph), and the parent of that too (the root of the DOM).
// Click handler on the document
document.addEventListener("click", e => {
  console.log("Document handler");
});
// Click handler on the paragraph
document.getElementById("para").addEventListener("click", e => {
  console.log("Paragraph handler");
});
// Click handler on the button
document.getElementById("propa").addEventListener("click", e => {
  console.log("Button handler");
});
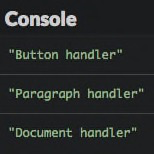
The result in the browser console demonstrates the propagation of click events from the button up to the document level. You clicked the button, which means you also clicked the paragraph, which means you also clicked the document.
But maybe you only want an event to kick off once the button is clicked and not count its larger ecosystem? Event propagation can be interrupted at any moment by calling the stopPropagation() method on the Event object from an event handler. This is useful to avoid the same event being handled multiple times.
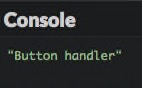
Adding a line in the button's click handler prevents the click event from propagating everywhere in the DOM tree.
// Click handler on the button
document.getElementById("propa").addEventListener("click", e => {
  console.log("Button handler");
  e.stopPropagation(); // Stop the event propagation
});
Cancelling the default behavior of an action
Most of the user actions on a page are associated to a default behavior. Clicking on a link navigates to the link target, clicking anywhere with the right mouse button show a contextual menu, etc. Cancelling a default behavior is possible by calling the preventDefault() method on the Event object in an event handler.
Let's use the following HTML code to see this possibility in action.
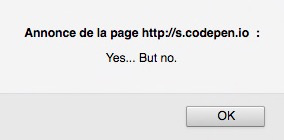
// Handling clicking on the forbidden link
document.getElementById("forbidden").addEventListener("click", e => {
  alert("Yes... But no.");
  e.preventDefault(); // Cancels the default behavior
});
Now clicking on the links shows a dialog instead of navigating to its target.
TL;DR
-
You can make a web page interactive by writing JavaScript code tied to events within the browser.
-
Numerous types of events can be handled. Each event type is associated with an
Eventobject that contains properties giving information about the event. -
keypress,keydownandkeyupevents let you react to keyboard-related events. -
click,mousedownandmouseupevents let you react to mouse-related events. -
Page loading and closing are associated with the events
loadandbeforeunload, respectively. -
An event propagates within the DOM tree from its node of origin up to the document root. This propagation can be interrupted with the
stopPropagation()method. -
Calling the
preventDefault()method on anEventobject cancels the default behavior associated with the action that triggered the event.
Coding time!
Counting clicks
Start with the following HTML content.
<button id="myButton">Click me!</button>
<p>You clicked on the button <span id="clickCount">0</span> times</p>
<button id="deactivate">Désactivate counting</button>
Write the JavaScript code that counts the number of clicks on the myButton button by updating the clickCount element. The deactivate button stops the counting.
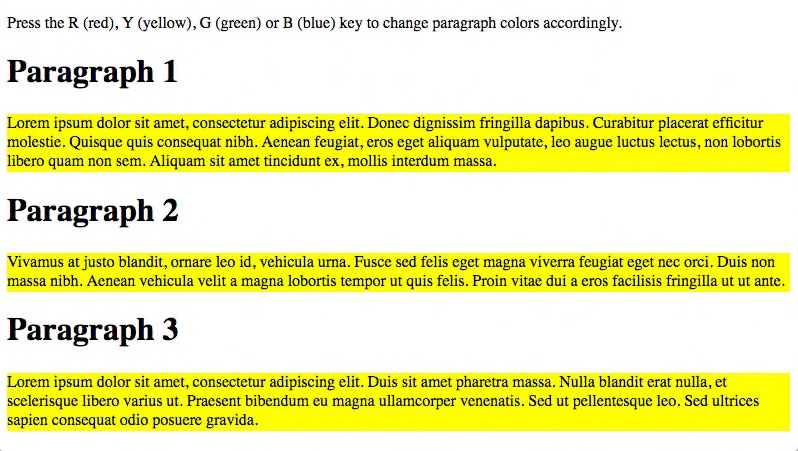
Changing colors
Here is some HTML content to start with.
<p>Press the R (red), Y (yellow), G (green) or B (blue) key to change paragraph colors accordingly.</p>

<h1>Paragraph 1</h1>
<div>Lorem ipsum dolor sit amet, consectetur adipiscing elit. Donec dignissim fringilla dapibus. Curabitur placerat efficitur molestie. Quisque quis consequat nibh. Aenean feugiat, eros eget aliquam vulputate, leo augue luctus lectus, non lobortis libero quam non sem. Aliquam sit amet tincidunt ex, mollis interdum massa.</div>

<h1>Paragraph 2</h1>
<div>Vivamus at justo blandit, ornare leo id, vehicula urna. Fusce sed felis eget magna viverra feugiat eget nec orci. Duis non massa nibh. Aenean vehicula velit a magna lobortis tempor ut quis felis. Proin vitae dui a eros facilisis fringilla ut ut ante.</div>

<h1>Paragraph 3</h1>
<div>Lorem ipsum dolor sit amet, consectetur adipiscing elit. Duis sit amet pharetra massa. Nulla blandit erat nulla, et scelerisque libero varius ut. Praesent bibendum eu magna ullamcorper venenatis. Sed ut pellentesque leo. Sed ultrices sapien consequat odio posuere gravida.</div>
Write the associated JavaScript code that updates the background color of all div tags according to the key (R, Y, G or B) pressed by the user.
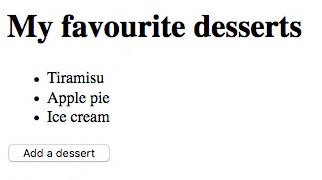
A dessert list
The following HTML code defines a list of desserts, empty for now.
<h1>My favourite desserts</h1>

<ul id="desserts">
</ul>

<button id="addButton">Add a dessert</button>
Write the JavaScript code that adds a new dessert to the list when the user clicks on the button. The dessert name is chosen by the user.
Bonus points for adding the possibility of changing a dessert's name when clicking on it.
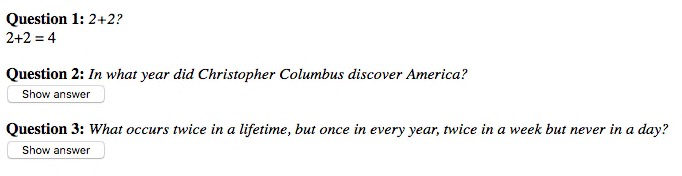
Interactive quiz
Here is the starter HTML code.
And the associated JavaScript code that defines a question list.
// List of questions (statement + answer)
const questions = [
  {
    statement: "2+2?",
    answer: "2+2 = 4"
  },
  {
    statement: "In which year did Christopher Columbus discover America?",
    answer: "1492"
  },
  {
    statement:
      "What occurs twice in a lifetime, but once in every year, twice in a week but never in a day?",
    answer: "The E letter"
  }
];
Complete this code to display the questions in the <div> element of the page, with a "Show the answer" button next to each question. Clicking this button replaces it with the answer for this question.