Send data to a web server
You just learnt how to retrieve some data from web servers or APIs. This chapter will teach you how to send data to them.
Sending data: the basics
Sending data to a server is usually done via an HTTP request using the POST method. In that case, the request body contains the data to be sent.
The data format depends on what the server expects. It can either be:
- Key/value pairs like when a form is directly submitted.
- JSON for more structured data.
Sending form data
If the web server expects direct form data, you can use the JavaScript FormData object to encapsulate the information to be sent.
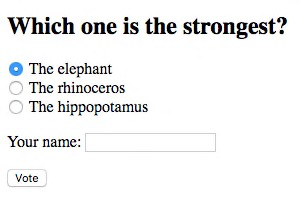
Here's an example form for choosing the strongest animal of all.
<h2>Which one is the strongest?</h2>
<form>
    <p>
        <input type="radio" name="strongest" id="elephant" value="ELE" checked>
        <label for="elephant">The elephant</label>
        <br>
        <input type="radio" name="strongest" id="rhinoceros" value="RHI">
        <label for="rhinoceros">The rhinoceros</label>
        <br>
        <input type="radio" name="strongest" id="hippopotamus" value="HIP">
        <label for="hippopotamus">The hippopotamus</label>
        <br>
    </p>
    <p>
        <label for="name">Your name</label>:
        <input type="text" name="name" id="name" required>
    </p>
    <input type="submit" value="Vote">
</form>
<p id="result"></p>
And here is the associated JavaScript code which handles the form submission.
// Handle form submission
document.querySelector("form").addEventListener("submit", e => {
// Cancel default behavior of sending a synchronous POST request
e.preventDefault();
// Create a FormData object, passing the form as a parameter
const formData = new FormData(e.target);
// Send form data to the server with an asynchronous POST request
fetch("https://thejsway-server.herokuapp.com/animals", {
method: "POST",
body: formData
})
.then(response => response.text())
.then(result => {
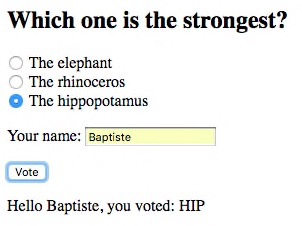
document.getElementById("result").textContent = result;
})
.catch(err => {
console.error(err.message);
});
});
The event listener starts by disabling the default form submission behavior, which is to send a synchronous HTTP POST request to a server. Instead, a FormData object is created with the form itself (the e.target expression) as a parameter. All form fields are automatically added as key/value pairs in this object.
Once the form fields are encapsulated in the FormData object, the fetch() method seen previously is used to send an asynchronous request to the https://thejsway-server.herokuapp.com/animals URL. The second parameter of the fetch() call sets the HTTP method as POST and adds the form data into the body of the request.
Lastly, the page's result element is updated when the server responds to the asynchronous request.
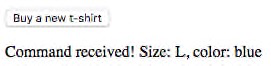
The FormData object can also be used independently of any form, to send custom key/value pairs to a server. Here is a very basic example form containing only a button.
When the user clicks on the button, custom data is added to a FormData object and sent to the server through an asynchronous POST request.
document.getElementById("buyButton").addEventListener("click", () => {
    // Create a new, empty FormData object
    const formData = new FormData();
    // Fill the object with key/value pairs
    formData.append("size", "L");
    formData.append("color", "blue");
    // Send data to the server
    fetch("https://thejsway-server.herokuapp.com/tshirt", {
      method: "POST",
      body: formData
    })
    .then(response => response.text())
    .then(result => {
      document.getElementById("result").textContent = result;
    })
    .catch(err => {
      console.error(err.message);
    });
});
Sending JSON data
When the information expected by the web server is more structured (with complex types, nested fields, etc), it's often a better choice to send it as JSON data.
For example, check out how to send a JavaScript array as JSON data to a web server.
// Create an array containing two objects
const cars = [
  {
    model: "Peugeot",
    color: "blue",
    registration: 2012,
    checkups: [2015, 2017]
  },
  {
    model: "Citroën",
    color: "white",
    registration: 1999,
    checkups: [2003, 2005, 2007, 2009, 2011, 2013]
  }
];

// Send this array as JSON data to the server
fetch("https://thejsway-server.herokuapp.com/api/cars", {
  method: "POST",
  headers: {
    Accept: "application/json",
    "Content-Type": "application/json"
  },
  body: JSON.stringify(cars)
})
  .then(response => response.text())
  .then(result => {
    console.log(result);
  })
  .catch(err => {
    console.error(err.message);
  });
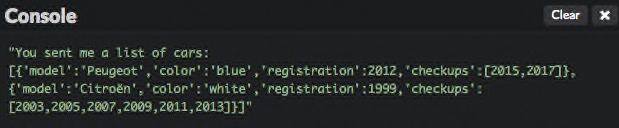
The second parameter of the fetch() call sets POST as the HTTP method to use, updates the request headers to indicate that the data format is JSON, and adds the JSON representation of the JavaScript array into the body of the request.
TL;DR
-
You can send information to a web server through an AJAX call translating into an HTTP
POSTrequest using thefetch()method. -
For sending HTML form data or key/value pairs, you use the
FormDataobject.
// Create a FormData object containing the HTML form data
const formData = new FormData(myForm);
// Send form data to the server with an asynchronous POST request
fetch("https://my-server-url", {
  method: "POST",
  body: formData
})
  .then();
- The
FormDataobject can also be used to send arbitrary key/value pairs to a server.
// Create a new, empty FormData object
const formData = new FormData();
// Fill the object with key/value pairs
formData.append("size", "L");
formData.append("color", "blue");
// ...
- When the information expected by the server is more structured, sending it as JSON data is more convenient.
// Create some JavaScript data
const myData = {
  // ...
};

// Send this data as JSON to the server
fetch("https://https://my-server-url", {
  method: "POST",
  headers: {
    Accept: "application/json",
    "Content-Type": "application/json"
  },
  body: JSON.stringify(myData)
})
  .then();
Coding time!
New article
Write the HTML code that shows input fields for creating a new blog article by entering its title and content.
Then, write the associated JavaScript code to send the article fields as form data to the URL https://thejsway-server.herokuapp.com/articles. You should receive a confirmation message from the server and display it on the page.
Warning
The server only accepts POST requests at this URL.
Visited countries
The goal of this exercise is to send your traveling info to a server. Data is expected as a JSON object containing two fields:
- A
namefield representing your name. Its value is a string. - A
countriesfield representing the countries you already visited. Its value is an array of objects. Each object has anamefield (string) for the country name, and ayearfield (integer) for the year you last visited it.
Here is an example of submitted data.
const traveler = {
  name: "Sam",
  countries: [
    {
      name: "Italy",
      year: 2022
    },
    {
      model: "Ireland",
      color: 2021
    },
    {
      model: "USA",
      color: 2021
    }
  ]
};
This data must be sent to the URL https://thejsway-server.herokuapp.com/api/countries. You should receive a confirmation message from the server and display it in the console.
